Sunday, December 26, 2010

Using Gmail to Send Emails (with attachments)


In this post we will learn how to send attachment in email like file or image also how to embed the image inside the email.

The good thing about Gmail is that we can use it to send emails as SMTP server.

Here is the needed steps:

1.Define the following attributes:

smtpServerIP = smtp.gmail.com;
smtpServerPort = 465;
smtpServerUser = Your gmail email;
smtpServerPassword = Your gmail email password;

2.The following is mail sending method:

public void sendMail(final String[] toUserEmail, final String subject, final String body,final BufferedImage myImage, final File file, final boolean isPicture) {

new Thread() {
@Override
public void run() {
try {
Properties props = new Properties();
props.put("mail.smtp.host", smtpServerIP);
props.put("mail.smtp.port", smtpServerPort);
props.put("mail.smtp.auth", "true");
//props.put("mail.debug", "false");
props.put("mail.smtp.socketFactory.port", smtpServerPort);
props.put("mail.smtp.socketFactory.class", "javax.net.ssl.SSLSocketFactory");
props.put("mail.smtp.socketFactory.fallback", "false");
Authenticator auth = new SMTPAuthenticator();
Session session = Session.getInstance(props, auth);
//session.setDebug(false);
// create a message
Message msg = new MimeMessage(session);
msg.setHeader("HomeMonitor", "By Osama Oransa");
// set the from and to address
InternetAddress addressFrom = new InternetAddress(smtpServerUser);
msg.setFrom(addressFrom);
InternetAddress[] addressTo = new InternetAddress[toUserEmail.length];
for (int i = 0; i < toUserEmail.length; i++) {
addressTo[i] = new InternetAddress(toUserEmail[i]);
}
msg.setRecipients(Message.RecipientType.TO, addressTo);
String[] messageParts = body.split("##");
//no thing attached
if (messageParts.length == 1) {
msg.setContent(body, "text/html");
//image is attached
//body is text and image
} else if (messageParts.length == 2) {
MimeMultipart multipart = new MimeMultipart();//"related");
MimeBodyPart messageBodyPart;
// first part html text before image
messageBodyPart = new MimeBodyPart();
if (isPicture) {
messageBodyPart.setContent(messageParts[0] + "

" + messageParts[1], "text/html");
multipart.addBodyPart(messageBodyPart);
ByteArrayOutputStream byteArrayOutputStream = new ByteArrayOutputStream();
boolean readingImageResult;
try {
readingImageResult = ImageIO.write(myImage, "jpg", byteArrayOutputStream);
System.out.println("Result of writing the image is " + readingImageResult);
} catch (IOException ex) {
ex.printStackTrace();
}
byte[] byteArray = byteArrayOutputStream.toByteArray();
MimeBodyPart messageBodyPart2 = new MimeBodyPart();
DataSource fds = new ByteArrayDataSource(byteArray, "image/jpg");
messageBodyPart2.setDataHandler(new DataHandler(fds));
messageBodyPart2.setHeader("Content-ID", "");
multipart.addBodyPart(messageBodyPart2);
msg.setContent(multipart);
} else {
//is file attached, like voice....
messageBodyPart.setContent(messageParts[0] + "
" + messageParts[1], "text/html");
multipart.addBodyPart(messageBodyPart);
// Part two is attachment
MimeBodyPart messageBodyPart2 = new MimeBodyPart();
DataSource source = new FileDataSource(file);
messageBodyPart2.setDataHandler(new DataHandler(source));
messageBodyPart2.setFileName(file.getName());
multipart.addBodyPart(messageBodyPart2);
msg.setContent(multipart);
}
}
// Setting the Subject and Content Type
msg.setSubject(subject);
Transport.send(msg);
System.out.println("Message sent to " + toUserEmail + " OK.");
} catch (Exception ex) {
ex.printStackTrace();
System.out.println("Exception " + ex);
}
}
}.start();
}

3. Define inner class for authentication:

// Also include an inner class that is used for authentication purposes
private class SMTPAuthenticator extends javax.mail.Authenticator {
@Override
public PasswordAuthentication getPasswordAuthentication() {
System.out.println("call authentication");
String username = smtpServerUser;
String password = smtpServerPassword;
return new PasswordAuthentication(username, password);
}
}


The method send email either plain email or with attachement or with embeded picture in it.
final String[] toUserEmail, final String subject, final String body,final BufferedImage myImage, final File file, final boolean isPicture)

It takes array of emails to send to them, subject and body of the email.
Then it take optional image or file to attach (not both so you can modify the method to include this extra-requirements)

The boolean isPicture is used to deal with picture as embedded object..

In case you need to attach image or file , you need to place in the body of the email the token ## file name or image name (or title).

This is easy usage method for sending emails with attachment and in our example we used Gmail as SMTP server.

Wednesday, December 22, 2010

Java Home Monitor Application

New Open source application is released..

URL:

http://sourceforge.net/projects/home-monitor/

In summary :

This application used to monitor your home via email using your USB web camera and microphone , there is a lot of configurations to customize it upon needs. A motion detection is also supported.

Features:

* Use USB web camera and microphone
* Work while computer is locked
* Differentiate between capturing the image/audio and sending them in email as attachments
* Configurable for customization of the needs
* Motion detection to send out of configuration shots.
* Can send emails using gmail user account.
* Captured media stored in specified directory and send some according to the configurations.
* Depends on LTI-CIVIL for accessing the USB camera: http://lti-civil.org/
* You can download the library and pick the needed library for the operating system
* Run over any operating system.
* Tested well in Java 5 , still there is issue in email sending with attachment in Java 6.
* Optionally Play sound/recorded message on repeated motion detection.
* Wait for configurable time before start capturing.
* In Version 1.1 (1) a new configuration item to delete old picture if new matched it.
* (2) Also FTP Support is added.

Future Enhancements:

-Detect motion detection in voice files ..
-Send video files (combined video+audio).
-Send SMS through any free gateway.

Saturday, December 18, 2010

Capture photo / image from Web Cam / USB Camera using Java

In this post we will show how to use a USB camera to capture a picture from inside a Java application..
We will use the library LTI-CIVIL which is part of FMJ (Freedom for Media in Java)


Let's go through the needed steps:

1.Download LTI-CIVIL:

Which is a Java library for capturing images from a video source such as a USB camera. It provides a simple API and does not depend on or use JMF!
The advantage behind this library that it doesn't depend on JMF (which is almost very old now)
The project URL: http://lti-civil.org/
Download URL: http://sourceforge.net/projects/lti-civil/files/

Extract the zip/tar file and you will find 2 things we will use:
a) lti-civil-no_s_w_t.jar
b) native folder contain the native libraries according to the operating system , pick the one for the system you are using.


2.Create the Java App:

Add to the class-path of the project the jar file and the native library folder.
To Run the project as jar file , you can use the JVM parameter:

-Djava.library.path=".....\native\win32-x86" to add the library to the class path of the jar file.


3.Create a class file:

Name it like TestWebCam implements CaptureObserver

4. Define the following instance variables:

JButton start = null;
JButton shot = null;
JButton stop = null;
CaptureStream captureStream = null;
boolean takeShot=false;

5.In the constructor:

Add the following code to initialize the capturing device:

public TestWebCam() {
CaptureSystemFactory factory = DefaultCaptureSystemFactorySingleton.instance();
CaptureSystem system;
try {
system = factory.createCaptureSystem();
system.init();
List list = system.getCaptureDeviceInfoList();
int i = 0;
if (i < list.size()) {
CaptureDeviceInfo info = (CaptureDeviceInfo) list.get(i);
System.out.println((new StringBuilder()).append("Device ID ").append(i).append(": ").append(info.getDeviceID()).toString());
System.out.println((new StringBuilder()).append("Description ").append(i).append(": ").append(info.getDescription()).toString());
captureStream = system.openCaptureDeviceStream(info.getDeviceID());
captureStream.setObserver(TestWebCam.this);
}
} catch (CaptureException ex) {
ex.printStackTrace();
}
//UI work of the program
JFrame frame = new JFrame();
frame.setSize(7000, 800);
JPanel panel = new JPanel();
frame.setContentPane(panel);
frame.setVisible(true);
frame.setDefaultCloseOperation(WindowConstants.DISPOSE_ON_CLOSE);
start = new JButton("Start");
stop = new JButton("Stop");
shot = new JButton("Shot");
panel.add(start);
panel.add(stop);
panel.add(shot);
panel.revalidate();
start.addActionListener(new ActionListener() {
public void actionPerformed(ActionEvent e) {
try {
captureStream.start();
} catch (CaptureException ex) {
ex.printStackTrace();
}
}
});
stop.addActionListener(new ActionListener() {
public void actionPerformed(ActionEvent e) {
try {
captureStream.stop();
} catch (CaptureException ex) {
ex.printStackTrace();
}
}
});
shot.addActionListener(new ActionListener() {
public void actionPerformed(ActionEvent e) {
takeShot=true;
}
});
}

6.Add the following 2 methods mandated by the implemented interface CaptureObserver:

public void onNewImage(CaptureStream stream, Image image) {
if(!takeShot) return;
takeShot=false;
System.out.println("New Image Captured");
byte bytes[] = null;
try {
if (image == null) {
bytes = null;
return;
}
try {
ByteArrayOutputStream os = new ByteArrayOutputStream();
JPEGImageEncoder jpeg = JPEGCodec.createJPEGEncoder(os);
jpeg.encode(AWTImageConverter.toBufferedImage(image));
os.close();
bytes = os.toByteArray();
} catch (IOException e) {
e.printStackTrace();
bytes = null;
} catch (Throwable t) {
t.printStackTrace();
bytes = null;
}
if (bytes == null) {
return;
}
ByteArrayInputStream is = new ByteArrayInputStream(bytes);
File file = new File("/img" + Calendar.getInstance().getTimeInMillis() + ".jpg");
FileOutputStream fos = new FileOutputStream(file);
fos.write(bytes);
fos.close();
BufferedImage myImage = ImageIO.read(file);
shot.setText("");
shot.setIcon(new ImageIcon(myImage));
shot.revalidate();
} catch (IOException ex) {
ex.printStackTrace();
}
}

public void onError(CaptureStream stream, CaptureException ce) {
System.out.println("Error!");
}

7.Optionally, to Covert image to Gray Scale:

In case you need to convert it into Gray scale (for image processing purposes you can replace the following line with this block:

Old Line:
shot.setIcon(new ImageIcon(myImage));

New Block:

//Convert myImage to gray scale
BufferedImage imageGray = new BufferedImage(myImage.getWidth(), myImage.getHeight(),
BufferedImage.TYPE_BYTE_GRAY);
Graphics g = imageGray.getGraphics();
g.drawImage(myImage, 0, 0, null);
g.dispose();
shot.setIcon(new ImageIcon(imageGray));


8.Add main method to this class to run it:

public static void main(String args[])
throws Exception {
TestWebCam test = new TestWebCam();
}

9.Connect the USB Camera and run the application...

It should show 3 buttons : Start , Stop and Shot..
Click on start , then on shot, it will get you the current web camera image, move the web camera and take another shot by click on the picture to update it.


**Possible Issues:

1.Native library is not in the classpath.
2.Wrong native library is used.
3.USB Camera is not correct connected or installed.
4.Another program is running connected to the camera resource (you may be running your program 2 times)

You can use the CaptureStream parameter as well, but i think if you need to capture a streaming web cam , it would better to use images with intervals.


*** UPDATE: based on a lot of requests asking about using it to capture videos, here is the new post discussing the topic in details:

WebCam Video Capture in Java

Hope this help more to address this issue in particular.

*** UPDATE|: based on number of requests to access the web camera from JSP file , here is a link to a post discussing the how to in details:

Accessing Webcam Within JSP


*** UPDATE: if you want sample code , please download my other open source project Interactive4J, it has example for video and images.

Friday, November 5, 2010

New Open Source : Java Web Chat Module

Overview:

This project aim to develop a plug-in module for ready use in Java Web application with a little effort, it has many ways to persist the account details (XML vs DB) and it can be used as a standalone application for "Support services" in the web sites.

Features:

* Web Chat Module
* Ajax based
* Support UTF-8 (for multi-lingual)
* Standalone Service or Plugin in your web site
* Easy customizable, account management is left to implementer
* XML-based account management is the default, you can use DB instead.
* Easy icons customization and adding more themes to it.
* Performance is good and least memory consumption.
* Support emoticons
* Sound is supported in IE (only currently, can be fixed later with HTML5)
* Messages failed to deliver returned to the sender.


Project URL:
http://sourceforge.net/projects/java-web-chat/

The module is easy customizable and fit into any Java web application (or non-Java) and can be used as a standalone chat gateway.

Source code in a Netbeans project can downloaded here.

Saturday, September 11, 2010

2010 Duke's Choice Awards Winner


http://java.com/en/dukeschoice/

The Duke's Choice Awards celebrate extreme innovation in the world of Java technology and are granted to the most innovative projects using the Java platform.

The 2010 Duke's Choice Awards winners will be featured at the Oracle Technology Network (OTN) tent on Mason Street (between Ellis and O'Farrell streets) during JavaOne in San Francisco September 20-23rd.

Innovative Health Care & Human Services
Pulse Pulse Health Intact System, remote telemedicine server that connects doctors, patients and care facilities. Monitoring devices connected to the patient's mobile phone is uploaded and shared. Uses Java EE 6 (server), Java SE 1.6 Swing clients (desktop) and Java ME CLDC (client)


http://www.oracle.com/technetwork/articles/java/dukeschoicewinners-171159.html

Java technologies: Server uses JDK1.6 and JEE 6 (Struts application with some exposed Servlets and Web Services), Java Encryption APIs, JDBC and Java Mail APIs. Mobile/PC clients use J2ME CLDC 1.0 and MIDP 1.1, push registry, Bluetooth APIs, File Connection APIs, Java SE 1.6 Swing, and RMS.

Employing a full complement of Java technology, the Pulse Health Intact system offers remote telemedicine solutions to the developing world—transmitting patient information and monitoring data (blood pressure, blood sugar, ECG, etc.) to doctors via Bluetooth connections and mobile handsets, as well as integrating with existent hospital medical record systems. The server portion of the system employs JDK1.6 and Java EE 6 (Struts application with some exposed Servlets and Web Services), Java Encryption APIs (for secure patient privacy), JDBC (for integration with existent hospital systems) and Java Mail APIs. Meanwhile, the mobile/PC client applications use J2ME CLDC 1.0 and MIDP 1.1, push registry, Bluetooth APIs, File Connection APIs, Java SE 1.6 Swing, and RMS to persist application settings. “Java’s complete set of APIs for web/enterprise solutions, Mobile applications, and standalone applications made this dream come true,” says company System Architect, Osama Oransa.


For more details about Health Intact click Here.

Here is some info about me in I'm future of the Java campaign:

http://www.oracle.com/us/javaonedevelop/future-of-java-168616.html#oransa

I have made a lot of efforts in gathering the requirements and put the architecture, high level and low level design of this solution.


Conference Keynote presentation in this URL:
http://ondemandpreview.vportal.net/?auid=146&sid=4171

Live interview with Oracle Technology Tent in this URL:
http://medianetwork.oracle.com/media/show/15627?n=playlist&nid=86


This Award is one of the important milestones in my life, but there will be still more and more isA and the coming should be better isA.

Osama Oransa

Tuesday, August 17, 2010

Cryptography 1

"Classical Cryptography"

Some Basic Terminology
*plaintext - original message
*ciphertext - coded message
*cipher - algorithm for transforming plaintext to ciphertext
*key - info used in cipher known only to sender/receiver
*encipher (encrypt) - converting plaintext to ciphertext
*decipher (decrypt) - recovering plaintext from ciphertext
*cryptography - study of encryption principles/methods
*cryptanalysis (codebreaking) - study of principles/ methods of deciphering
*ciphertext without knowing key
*cryptology - field of both cryptography and cryptanalysis

We have 2 big categories in cryptography private key (single key) or public key (double key) all classical cryptography fall into the private key where a key exist and we need to keep it private between the sender and reciver only .. We will discuss the public key with the modern cryptography..

Let's discuss the Classical Cryptography: this include 3 types ; substitution where some letters replace by others , transposition where exchange some letters positions and the 3rd type is one time pad where the letter changed totally by manipulating them the key..

A) Classical Substitution Ciphers:

-letters of plaintext are replaced by other letters or by numbers or symbols
1.Caesar Cipher:
Replaces each letter by 3rd letter (or k shifted letter)
example:
meet me after the toga party
PHHW PH DIWHU WKH WRJD SDUWB
Mathematically give each letter a number (a=0,.....z=25)
a b c d e f g h i j k l m n o p q r s t u v w x y z
0 1 2 3 4 5 6 7 8 9 10 11 12 13 14 15 16 17 18 19 20 21 22 23 24 25

then have Caesar cipher as:
c = E(p) = (p + k) mod (26)
p = D(c) = (c – k) mod (26)

2.Monoalphabetic Cipher:
Rather than just shifting the alphabet ,could shuffle (jumble) the letters arbitrarily
each plaintext letter maps to a different random ciphertext letter hence key is 26 letters long

Plain: abcde fghij klmno pqrst uvwxyz
Cipher: DKVQF IBJWP ESCXH TMYAU OLRGZN

Plaintext: if we wish to replace letters
Ciphertext: WI RF RWAJ UH YFTSDVF SFUUFYA

now have a total of 26! = 4 x 1026 keys with so many keys, might think is secure but would be !!!WRONG!!! problem is language characteristics=Language Redundancy and Cryptanalysis:
letters are not equally commonly used in English E is by far the most common letter followed by T,R,N,I,O,A,S other letters like Z,J,K,Q,X are fairly rare


3.Playfair Cipher:
one approach to improving security was to encrypt multiple letters the Playfair Cipher is an example a 5X5 matrix of letters based on a keyword fill in letters of selected keyword,fill rest of matrix with other letters eg. using the keyword MONARCHY


Plaintext is encrypted two letters at a time
-If a pair is a repeated letter, insert filler like 'X’.
e.g. BALLOON will be treated as: BA LX LO ON
-If the plaintext has an odd number of characters, a 'X' letter is appended to the end of plaintext.
-Encryption:
* If both letters m1 and m2 fall in the same row, then c1 and c2 replace each with letter to the right of m1 and m2, respectively.


* If both letters fall in the same column, replace each with the letter below it


* Otherwise each letter is replaced by the letter in the same row and in the column of the other letter of the pair.

And Reverse this in decryption.

4.Vigenère Cipher:
basically multiple caesar ciphers ,key is multiple letters long K = k_(1) k_(2) ... k_(d)
based on a Vigenère Tableau

Plaintext THIS PROC ESSCANAL SOBE EXPRES SED
Keyword CIPH ERCI PHERCIPH ERCI PHERCI PHE
Ciphertext VPXZ TIQK TZWTCVPS WFDM TETIGA HLH


(Vigenère Tableau)

B) Classical Transposition Ciphers:
Letters positions exchanged using a key by which we can decrypt the message by returning the letters to the original location.

1.Scytale cipher
:
a strip of paper was wound round a staff message written along staff in rows, then paper removed leaving a strip of seemingly random letters. not very secure as key was width of paper & staff


2.Geometric Figure
Write message following one pattern and read out with another
Example: I CAME I SAW I CONQUERED


3.Row Transposition ciphers:
In general write message in a number of columns and then use some rule to read off from these columns.
Key could be a series of number being the order to: read off the cipher; or write in the plaintext.
Also We can use a word, with letter order giving sequence: to write in the plaintext; or read off the cipher

Key (W): C O M P U T E R
Key (W): 1 4 3 5 8 7 2 6


C) One-Time Pad:
If a truly random key as long as the message is used, the cipher will be secure
called a One-Time pad is unbreakable since ciphertext bears no statistical relationship to the plaintext since for any plaintext & any ciphertext there exists a key mapping one to other can only use the key once though problems in generation & safe distribution of key.

Key is never re-used and generated from Unpredictable random numbers (physical sources, e.g. radioactive decay)

By either subtraction (in Traditional) and XOR (or modulo 2 addition) in modern.
Key=581295 , Plain=853759
-Encryption: (subtraction)
5 8 1 2 9 5
__

8 5 3 7 5 9
___________

7 3 8 5 4 6

-Decryption:
5 8 1 2 9 5
__
7 3 8 5 4 6
____________
8 5 3 7 5 9

-Encryption (XOR):
Plain 01010011000111
Key 00110011001100
_________________________
Cipher 01100000001011

-Decryption (XOR):
Cipher 01100000001011
Key 00110011001100
_________________________
Plain 01010011000111


Abstracted from Dr.Baha Hasan Lectures, AAST

Sunday, August 15, 2010

Game Play AI with Tic-Tac-Toe Example

In Gaming AI engine you have many ways for implementation but you have few strategic , you can calculate the current situation and play the best move , or estimate it based on thinking of the sequential of all possible movements, this is typically what happen in chess playing in particular, you spend a lot of time estimating the sequential of the all possible movement..

Another factor that affect the AI strategy which is the number of steps prediction ability and the more the number of future steps calculation the best AI engine results but the slower response (and difficult for programming)

Let's take Tic-Tac-Toe Game as a good simple example:

1) Non-predictive AI engine:
-We instantiate AI engine
-Update current border pieces positions
-Get the suggested move which is the best for current situation but not the best as strategic planning..

Note: For board gaming you need to represent the board by double array and the value of each item represent the current piece on it, in case of XO we can use 0 as empty 1 for X and 2 for O , for Chess it would be more complex , so you may need to have schema : 0 = empty ,1x = white piece (11=King, 12=Queen , 13=Rock,14=Horse,...), 2x = Black piece (21=King, 22=Queen , 23=Rock, 24=Horse,...)

public GameAI(int [][] box,int winValue,int lossValue,int levelOfAI) {
this.box=box;
this.winValue=winValue;
this.lossValue=lossValue;
this.levelOfAI=levelOfAI;
}

public int[][] play (){
//try to win the game
if(tryToWin()) return box;
//try to prevent him from win
if(tryToPreventLoss()) return box;
//try to play in the center
if(tryToCenteralize()) return box;
return box;
}

where try to win try to identify places to put the coin to win, while try to prevent loss try to identify certain places where the other user can win if left , and the third one try to centralize for the best wining options and it handle certain centralize problems according to the AI level you can skip certain conditions so it can be beaten by the user.

Also this AI engine can be used for suggested movement by the user by inverting the instantiation of win-Value and loss-Value.

2) Predictive AI engine:
-We instantiate AI engine
-Update current border pieces positions
-Get the suggested move based on predicted movement, so the suggested move is the best move for the number of predicted movement.

The predictive engine use the heuristic search algorithm to find the best movement, in case of XO we have the heuristic defined as :

E(n) = Hx(n) - HO(n) suppose the user play with the X piece
where
Hx(n) = Number of lines that can be completed by the X player
Ho(n) = Number of lines that can be completed by the O player

Example:


Hx(1)=number of line can be completed by X to win = red lines = 8 lines
Ho(1)=number of line can be completed by O to win = green lines = 4 lines
So E(1) = 8 - 4 = 4 and no other location of the X piece will give better heuristic value.

Another example:


Hx(1)=number of line can be completed by X to win = red lines = 8 lines
Ho(1)=number of line can be completed by O to win = green lines = 6 lines
So E(1) = 8 - 6 = 2 So if X-player select this location he will loss 2 advantage points over the O-player..

The Min-Max means you select the maximum for the current play and minimum for the next play (minimum for me = max for the opponent) then the max , min ,...etc.. until predictive steps ends up.

In the current tree, we will estimate the play for 2 future movement for the best current move for O player after the X played into the center, this is similar to what human brain calculate usually (So we will select max for the current play from the next level tree, then the minimum , ...etc..)


(Click on the image to enlarge)

NOTE:Consider the reflection of pieces position so the selected corner position for example, have 4 possible values, this is usually selected by random generation to make a difference in each playing movement, so whenever the X-player place the piece at the center the O-player should play a piece on one of the 4 corners..

Saturday, July 31, 2010

Publishing Some Of My Games

I have published some of my old games into Mobango web site as freeware.

Here is the links to them:

1) Fisher Game:


Click Here to go to its page

2) Help Chicken:


Click Here to go its page

3) Bricks Game:


Click Here to go to its page

4) Space War Game:


Click Here to go to its page


I will publish more games later on from my store hope you enjoy them esp the multi-player bluetooth games.

Friday, July 16, 2010

Enhance Your Mind Ability

In this post we will give a small introduction about how to use few rules to enhance the speed of mathematical calculations using your mind...

The 1st advice is to try to calculate every thing in your mind even if you can do the same with few click on the calculator to motivate your mind to focus on these mathematical operations..

We will focus in this post in Multiplication Easiness Rule: (*)

If you have 2 numbers multiplied like 150*100 what you do is just adding the 00 beside the 150 and you get 150 00 so it is easy operation, this is what we will try here is to convert any number into 2 numbers (or more) where the biggest number contain zero(s) so the operation become easier..
Let's take the example of 17*3 we will convert 17 into (20-3) and multiply it with 3 so the result : 20 * 3 - 3 * 3 = 60 - 9 = 51

Let's complicate it more:
43*8 = (40+3)*8 = 40 * 8 + 3 * 8 = 320 - 24 = 344
//it could be also done by 50-7 but 40+3 is easier in calculations..

Here is some other examples:

300 * 56 = 300 * (50+6) = 3000*5 + 300*6 = (3*5)000=15000+ (3*6)00 =16800
109 * 97 = 109 * (100-3)=109 00 - 109*3 =10900 - 327= (10500 + 400-327)=10573
//here we chose to do it 109*(100-3) as easier than (100+9)*97
77*37 = (80-3) * (37) = ...

33*66= (33*(70-4)) =...

I hope these simple rules make the multiplication as easy as you can do it inside your mind without the need to use the calculator :)

Add Zooming Feature To You Web Images


Today we will discuss how to do simple zooming of the images using one of existing java script libraries to do this, the advantage of the selected one, is that it do the zooming without the need to have 2 versions of the images one is large and another small one...

Let's define the easiest simple steps to do it:

NOTE: the selected library URL: http://www.dynamicdrive.com/dynamicindex4/imagepanner.htm , you may go open it and you will see other steps listed there as well.


1.Place the following 2 images in your web application images folder.


2.Download the Java Script files:

http://www.dynamicdrive.com/dynamicindex4/imagepanner.js
http://ajax.googleapis.com/ajax/libs/jquery/1.4.2/jquery.min.js


3.Edit the JavaScript file : imagepanner.js to point to the correct folder of the 2 images

//this line need to be fixed
magnifyicons: ['magnify.gif','magnify2.gif', 24,23],

4.In the head of your page or in the imported CSS file:

(You may wish to change the width and height according to the available size on the web page, and alter the border to be dotted or not , its size ...etc.)

<style type="text/css">
/*Default CSS for pan containers*/
.pancontainer{
position:relative; /*keep this intact*/
overflow:hidden; /*keep this intact*/
width:300px;
height:300px;
border:1px dotted black;
}
</style>

<script type="text/javascript" src="jquery.min.js"></script>
<script type="text/javascript" src="imagepanner.js">

/***********************************************
* Simple Image Panner and Zoomer- (c) Dynamic Drive DHTML code library (www.dynamicdrive.com)
* This notice MUST stay intact for legal use
* Visit Dynamic Drive at http://www.dynamicdrive.com/ for this script and 100s more
***********************************************/
</script>


5.Surround the image by the following div:
<div class="pancontainer" data-orient="center" data-canzoom="yes" style="width:400px; height:300px;">

(Adjust also here width and height of the container)

<img src="image URL here"/>

</div>

Of course you can have image URL to a servlet that return a stream of bytes of the image and set the content type of this stream as the image type, so it become dynamic zooming ability..

At the end, don't forget to keep the copyright notice!

Friday, June 18, 2010

Custom Font For J2ME

In this post we will go throw in doing our custom font to use inside our J2ME applications..

The main advantage of this font class is that you can control the size of the font and its appearance over different application and not leave this render operation to the mobile device implementation.

There are 2 different ways to do this custom J2ME fonts:

1.Image-based Font:


In this way we have image that contain all our possible images and cut our needed clip from the picture according to the needed font, the image should have the following properties if possible:
1.Transparent .png background.
2.Size of each letter should be the same.
3.Space between each letter and the other should be the same either 0 or fixed space size like 1 point.
4.Best to have small font image and large font image.
5.Font color may be included in the picture also, so you need to have some thing like this:
font_small_black.png
font_small_red.png
font_large_black.png
font_large_red.png

6.The Place of the letter should be easily calculated for easiness of the operation, so we can use letter location=Asci code or ASCI code - fixed number , so we can decode each letter easily.

Dummy code for this:

letterSize=7;
spacing=1;
public void drawStatement(Graphics g,String stat,int x, int y){
loop over stat length ....{
....get current letter
....call private method drawLetter(g,char c,x,y)
x+=letterSize+spacing;
}
}

private void drawLetter(Graphics g,char c){
int position=c-30;
//draw clip of the letter
}

2.Vector/Draw Font:

In this way , we will need to draw each letter ourself , so it will be slower thing to do, and only needed for small needed statements over the screen ...


public class TextWriter {
private static TextWriter writer=new TextWriter();
private TextWriter() {
}
public static TextWriter getWriter(){
return writer;
}
public void drawString(Graphics g ,String str,int x , int y){
if(str!=null){
int n=str.length();
for(int i=0;i drawLetter(g,str.charAt(i),x+9*i,y);
}
}
}
private void drawLetter(Graphics g,char c,int x,int y){
switch(c){
case 'A':
case 'a':
g.fillRect(x,y,1,5);
g.fillRect(x,y+6,1,5);
g.fillRect(x+6,y,1,5);
g.fillRect(x+6,y+6,1,5);
g.fillRect(x+1,y,5,1);
g.fillRect(x+1,y+5,5,1);
break;
case 'O':
case 'o':
g.fillRect(x,y+1,1,4);
g.fillRect(x,y+6,1,4);
g.fillRect(x+6,y+1,1,4);
g.fillRect(x+6,y+6,1,4);
g.fillRect(x+1,y,5,1);
g.fillRect(x+1,y+10,5,1);
break;
case 'Q':
case 'q':
g.fillRect(x,y+1,1,4);
g.fillRect(x,y+6,1,4);
g.fillRect(x+6,y+1,1,4);
g.fillRect(x+6,y+6,1,4);
g.fillRect(x+1,y,5,1);
g.fillRect(x+1,y+10,5,1);
g.drawLine(x+4,y+7,x+7,y+11);
break;
case 'D':
case 'd':
g.fillRect(x,y,1,5);
g.fillRect(x,y+6,1,5);
g.fillRect(x+6,y+1,1,4);
g.fillRect(x+6,y+6,1,4);
g.fillRect(x+1,y,5,1);
g.fillRect(x+1,y+10,5,1);
break;
case 'S':
case 's':
g.fillRect(x,y,1,5);
g.fillRect(x+6,y+6,1,5);
g.fillRect(x+1,y,5,1);
g.fillRect(x+1,y+5,5,1);
g.fillRect(x+1,y+10,5,1);
break;
case 'R':
case 'r':
g.fillRect(x,y,1,5);
g.fillRect(x,y+6,1,5);
g.fillRect(x+6,y,1,5);
g.drawLine(x+3,y+6,x+6,y+10);
g.fillRect(x+1,y,5,1);
g.fillRect(x+1,y+5,5,1);
break;
case 'U':
......etc...
}
}

We can choose a lot of custom font methodologies to draw the font.

Friday, April 16, 2010

Pie Chart using Java Script


In this tutorial we will show the simplest way to draw pie chart using java script..This is important to show some statistics of your system.

The Java script library used here is from http://www.walterzorn.com/jsgraphics/jsgraphics_e.htm

Let's imagine we need to export a registered users profile/statistics of a medical system and we need to know the number of registered users according to there roles and in a specific period.

Here is the steps:


1.Create Statistics Bean contains the attributes we need to view.
Example:
Select count(*) from users;
Select count(*) from users where role='Doctor';
Select count(*) from users where role='Patient';
Select count(*) from users where register_date between start_date and end_date;
Select count(*) from users where role='Doctor' and register_date between start_date and end_date;
Select count(*) from users where role='Patient' and register_date between start_date and end_date;

We will store the result values into bean variables.

2.Utility method for calculations:
In a helper class, add this utility method so it remove a lot of checks in the jsp file itself.

public static float devide(int value,int value2){
try{
if(value==0 || value2==0){
return 0;
}
float result=Math.round((float)value/value2*100);
return result;
}catch(Throwable t){
}
return 0;
}

This method will round the value and will check for 0 values.


3.In your JSP page ..
You need to have a specific dev to draw the pie chart on it.

<div id='pie' style="position:relative;">

The relative value is important as it allow drawing from x,y of this dev.


4.Import Java Script draw library:

<script language="JavaScript" src="/.../js/wz_jsgraphics.js"></script>


5.Add the JS draw method , it will looks like:
<script language="JavaScript">
function drawUsers(){
jg = new jsGraphics("s1");
jg.setPrintable(true);
jg.setColor("#999999");
jg.fillOval(500,285,60,50);
jg.fillOval(200,285,60,50);
jg.setColor("#0000ff"); // or use blue word
jg.fillEllipse(500,280,60,50,270.0,220.0);jg.drawString("Total Users="+<%=data.getUsers()%>,570,280);
jg.fillEllipse(200,280,60,50,270.0,220.0);jg.drawString("Period Added Users="+<%=data.getUsersInPeriod()%>,270,280);
jg.setColor("#ff0000"); // or use red word

value=<%=HelperUtils.devide(data.getDoctors(),data.getUsers())%>;
value2=<%=HelperUtils.devide(data.getPatients(),data.getUsers())%>;
value3=<%=HelperUtils.devide(data.getHealthUnits(),data.getUsers())%>;
if(value!=0) jg.fillArc(500, 280, 60,50,0,360*value/100);
jg.drawString("Total Dcotors="+value+"%",570,300);
jg.setColor("#00ff00"); // green
if(value2!=0) jg.fillArc(500, 280, 60,50,360*value/100,360*value/100+360*value2/100);
jg.drawString("Total Patients="+value2+"%",570,320);
jg.setColor("#ff00ff"); // magenta
if(value3!=0) jg.fillArc(500, 280, 60,50,,360*value/100+360*value2/100,360*value/100+360*value2/100+360*value3/100);
jg.drawString("Total HealthUnits="+value3+"%",570,340);
//new users graph
jg.setColor("#ff0000"); // red
value=<%=HelperUtils.devide(data.getDoctorsInPeriod(),data.getUsersInPeriod())%>;
value2=<%=HelperUtils.devide(data.getPatientsInPeriod(),data.getUsersInPeriod())%>;
value3=<%=HelperUtils.devide(data.getHealthUnitsInPeriod(),data.getUsersInPeriod())%>;
if(value!=0) jg.fillArc(200, 280, 60,50,0,360*value/100);
jg.drawString("Period Added Dcotors="+value+"%",270,300);
jg.setColor("#00ff00"); // green
if(value2!=0) jg.fillArc(200, 280, 60,50,360*value/100,360*value/100+360*value2/100);
jg.drawString("Period Added Patients="+value2+"%",270,320);
jg.setColor("#ff00ff"); // magenta
if(value3!=0) jg.fillArc(200, 280, 60,50,,360*value/100+360*value2/100,360*value/100+360*value2/100+360*value3/100);
jg.drawString("Period Added HealthUnits="+value3+"%",270,340);
jg.paint();
return;
}
</script>

6.In the body add:
<body onload="drawUsers();">

Simple and straightforward steps, the output will looks exactly like the post image.

You can enhance it more by drawing a small box as a chart key , beside each label and keep the label color as black, here is an example:


This done by drawing a box 6x6 beside each label :

jg.fillRect(570,5,6,6);

Other enhancements can be considered like increase the pie chart size and write over each section...etc.

Friday, April 9, 2010

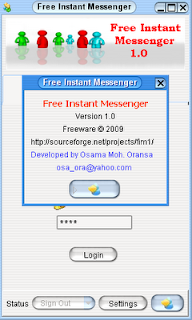
Free Instant Messenger Server/Client 1.0


Today i have posted my 1st free project at SourceForge.net

Free Instant Messenger Server/Client 1.0

The project posted at the URL:

https://sourceforge.net/projects/fim1/

This project contain 3 parts:

1.Chat Server
2.Chat Admin Client
3.Chat Client (image above)

They are build over Java Remote Method Invocation (RMI) technology, there are a lot of features in this server , including 3 different security level , file transfer , announcements , nice emoticons and easy customizable project.

The installation of this chat server toke less than 2 minutes !

Here is a copy of the installation guide installed on the SourceForge:


Free Instant Messenger V1.0

Installation Guide of FIM Server
================================
FIM Version 1.0
---------------
Developed by

Osama Mohammad Oransa
© 2009

How to Run FIM Server:
======================
1.Open the admin config foler:

a) Open server.properties:
Change the following:
rootNode=MyCompany
--> change it to express your company or organization name.
--> You may change the working port as well

b) Open data2.xml
Edit the admin user email account, into the needed email of your company admin:


1000
Admin User
admin@my.org

2.Run Start Server .exe file or batch file (windows .bat) or .jar file by : java -jar command in UNIX (same as in the batch file).

3.Go to the admin config folder:
Edit the following configurations:

serverURL=localhost
serverPort=1190
adminEmail=admin@my.org

--> Admin email account and the server IP and port.

4.Run Admin Interface
--> Default password is adminadmin
Once you logged in change the adminadmin interface to any password.

5.Default password for any created user is user, you can change it easily by admin interface, set default password.

6.Before distrubute the client interface, go to the config folder and edit the following:
userEmail=@my.org
serverURL=localhost
serverPort=1190

-->Update email domain to your organization/company domain.
-->Update server IP and Port.

7.You can run now the client , default password is "user" , unless you changed it by default password option in the admin interface, ask the system users to change the passwords once log into the system.


This is how the admin interface looks like.


Enjoy it..... or participate in developing it and integrate it with the standard protocol like XMPP.

You can also customize it , enhance it and release a new variant of it.


Wednesday, April 7, 2010

Nice Mathematical Operations

In this post we will share some nice mathematical operations, these operations exist in all languages we will show the logic behind them or work-around to get the same result for any reason.
The common thing when you work on mobile headset and it is still old and not supporting float calculations, how to avoid max loss of precision especially in case of sequential operations.

(1) Square Root:
//Newton’s method for finding the root of a function
private static double square_root(double a){
double x=0 , xold=0 ;
x = a;
do{
xold = x ;
x=(xold+(a/xold))/2.0;
System.out.println(x) ;
} while(x!=xold);
return x;
}

(2) Simple Round Function:
This is the logic behind the round function, add 0.5 to the fraction number and take the int value.
//simple round function using float to int.
private static int round(float s){
int x=new Double(s+0.5).intValue();
System.out.println("Round results="+x) ;
return x;
}

(3) Get Maximum Precision when no Float operations supported:
This is done simple by multiplying 1 number into predefined number according to the needed precision, then do the multiplication/division operation then divide the results again by this value to get the max possible precision.

private static int noFloatCalculation(int x,int y){
System.out.println("No Float results b4="+x/y) ;
int percision=100;
int s=(x*percision)/(y);
s=s/percision;
System.out.println("No Float results="+s) ;
return s;
}

(4) Get the Greatest Common Divisor for 2 numbers:(Euclid’s)
//Euclid’s Greatest Common Divisor (GCD)
private static int calculateGCD(int a, int b){
while(a!=b){
if(a>b) a=a-b;
else b=b-a;
}
System.out.println( "GCD="+a ) ; // or b since a=b
return a;
}

(5) Cumulative sum from 0 to x:
//cumulative sum from 0 to the send number
private static int caluclateSumFromZero(int end){
int i,start=0;
int cumulLoop=0;
for ( i=start; i<end ; i++) {
cumulLoop+=i ;
}
int cumul=(end*(end-1))/2;
System.out.println( cumulLoop+" closed -form:"+cumul);
return cumul;
}


(6) Calculating Factorial of a number:
//using recursive call
public static int factorial(int n){
if(n==0) return 1;
else return n*factorial(n-1);
}

(7) Selection Sort Algorithm:
To sort array of int , loop over them and swap the smaller one till you sort the array completely.

//loop sequential replace current with the the smallest one (if current is not the smallest)
//using 2 nested loops
static void SelectionSort(int[] array) {
int n=array.length;
for ( int i =0; i<n-1; i++){
for ( int j=i+1; j<n ; j++){
if(array[i]>array[j]){
//swap them
int temp=array[i];
array[i]=array[j];
array[j]=temp;
}
}
}
}
}

For String objects you do the same but you need to use the java built in compareTo() method to compare the 2 Strings, that return
the value 0 if the argument string is equal to this string; a value less than 0 if this string is lexicographically less than the string argument; and a value greater than 0 if this string is lexicographically greater than the string argument

//for String objects ...
static void SelectionSort(String[] array) {
int n=array.length;
for ( int i =0; i<n-1; i++){
for ( int j=i+1; j<n ; j++){
if(array[i].compareTo(array[j])>0){
//swap them
String temp=array[i];
array[i]=array[j];
array[j]=temp;
}
}
}
}

(8) Convert Decimal format into integer format:
To convert number formatted like 12.45 into 1245/100 , We simple multiply the number with the number of digits after the decimal point then we can get the integer division format...

Now what if we have round number like 15.23232323...... and 23 is repeated forever ?
We do the following simple steps:
x = 15.23232323..... (23 is repeated forever)
100x=1523.23232323...... (get 1 of the repeated sequence to the left of decimal point)
now subtract x from 100x --> 99x = 1508.0 so x=1508/99

Another example:
If we have x=15.8567567567567..... (567 is repeated forever)
1st 10x=158.567567567..... (get rid of the un-repeated part)
10000x=158567.567567.....
(get 1 of the repeated sequence to the left of decimal point)
now subtract 10x from 10000x --> 9990x=158409.0 , so x = 158409/9990.

Easy , right ?


Saturday, April 3, 2010

DICOM To Image

In this post we will go through using some free utilities to convert the DICOM file format; DICOM refer to Digital Imaging and Communications in Medicine.

For more information about DICOM visit the wiki page:

http://en.wikipedia.org/wiki/Digital_Imaging_and_Communications_in_Medicine

The Free utility "DICOM2" , can be downloaded from the URL:

http://www.barre.nom.fr/medical/dicom2/

It is free command line program, that can covert DICOM into any image format.

To try this example we need to download DICOM samples , an example for these sample files at the URL:
http://webscripts.softpedia.com/scriptDownload/DICOM-Example-Files-Download-34432.html

Put dicomm2.exe in the same folder of the images and run the following command:

dicom2.exe -param file

Examples :
1.To covert it into BMP:

>dicom2.exe -w brain_001.dcm
This will produce .BMP of this image

>dicom2.exe -t brain_001.dcm
This will produce .TXT of this image (i.e. meta-data of the DICOM file)

Example of the output image (brain_001.BMP):

Monday, March 29, 2010

Simple Captcha with Struts


In this post we will learn how to use simple Captcha with Struts to create Captcha for confirming that the interacting user is a person not a computer..

Here is a 5-steps implementation:

1.Download the Simple Captcha jar:

Here is the link:

http://sourceforge.net/projects/simplecaptcha/files/SimpleCaptcha/1.1.1/SimpleCaptcha-1.1.1.jar/download

2.Add the jar to your web project classpath:

Typically inside web-inf/lib folder

3.Add new servlet to your web project:
Name: CaptchaServlet

*Implement doGet method:

try {
Captcha captcha = new Captcha.Builder(200, 50).addText(new DefaultTextProducer(6)).gimp(new DropShadowGimpyRenderer()).build();
//200, 50 is the size, 6 is the number of letters to use, we choose the shadow renderer.
response.setHeader("Cache-Control", "no-store");
response.setHeader("Pragma", "no-cache");
response.setDateHeader("Expires", 0);
// don't cache it , don't store it, expire after 0 second, so with refresh new image loaded
response.setContentType("image/jpeg");
//image type
CaptchaServletUtil.writeImage(response, captcha.getImage());
//write the image
request.getSession().setAttribute("CorrectAnswer",
captcha.getAnswer());
//store the answer for this in session
} catch (Exception e) {
response.sendError(HttpServletResponse.SC_INTERNAL_SERVER_ERROR);
return;
}

4.In Your action class: (where the html form that include Captcha is submitted) add the following code:

//registerFormBean is the form bean of the current action and captcha response is the field of user input

String answer =
request.getSession().getAttribute("CorrectAnswer");
if (answer == null || registerFormBean.getCaptchaResponse()==null || !answer.equals(registerFormBean.getCaptchaResponse())){
ActionErrors errors = new ActionErrors();
errors.add("error1", new ActionMessage("error.captcha"));
}

error.captcha contain the following value in resource bundle:
error.captcha=Invalid value of shown text!

//so we check either pass successfully or add to errors error regarding captcha.


5.In the JSP file , add the following:

<img id="captchaImg" src="/...context..../CaptchaServlet" alt="Captcha Image" height="45">
<img src="/...context..../images/reload.jpg" alt="Reload" onclick="document.forms[0].captchaImg.src='/...context..../CaptchaServlet?id='+Math.random();" style="cursor:pointer"/>
<br><font color=red>*</font>Enter Value Shown:
<br><html:errors property="error1"/><br>
<html:text property="captchaResponse" maxlength="6" style="width:100pt"/>

-This will construct the Captcha and the text field to enter the value and struts error message to show errors in captcha response, plus the refresh icon.


NOTE: a good trick we used here is the java script Math.random() function , this way prevent certain browsers like Firefox 3.0 to cache the URL and keep posting the same Captcha image , this enforce it to get the new value without doing any more effort.

Here is how it will looks like:

Invalid content Error Message shown here:


For more details refer to the web site :

http://simplecaptcha.sourceforge.net/index.html


Sunday, March 28, 2010

RESTful WS & ROA in JDC 2010 (My Presentation)


In Java Developer Conference 2010 , i have spoken about the RESTful Web Serivces and Resource Oriented Architecture.

I gave overview over the basic web concepts , REST concepts , how to implement RESTful WS using Jersey implementation of the Java specification JAX-RS (JSR-311), using Ajax with RESTful WS and finally what is known as ROA (Resource Oriented Architecture)

The term REST comes from Roy Fielding's PhD dissertation, published in 2000, and it stands for REpresentational State Transfer. REST by itself is not architecture.

REST is a set of constraints that, when applied to the design of a system, creates a software architectural style.

Fielding ends with the following constraints that define a RESTful system:
• It must be a client-server system
• It has to be stateless—there should be no need for the service to keep users’ sessions; in other words, each request should be independent of others
• It has to support a caching system—the network infrastructure should support cache at different levels
• It has to be uniformly accessible—each resource must have a unique address and a valid point of access
• It has to be layered—it must support scalability
• And others.

These constraints don't dictate what kind of technology to use; they only define how data is transferred between components and what are the benefits of following the guidelines.

Therefore, a RESTful system can be implemented in any networking architecture available.

More important, there is no need for us to invent new technologies or networking protocols: we can use existing networking infrastructures such as the Web to create RESTful architectures.

Consequently, a RESTful architecture is one that is maintainable, extendable, and distributed.

In September, 2009, the final release of Sun JAX-RS (JSR-311) provides a high level declarative programming model; with the ability to create Restful Web Services by using this implementation we can achieve Resource Oriented Architecture (ROA).

You can find the presentation at:

http://jdc2010.egjug.org/node/29

Using Ajax with Struts


In this post we will go through the easiest way to add Ajax support in struts application, this means using the Action class not Servlet in the Ajax URL..

We will go through adding Ajax support to check on the uniqueness of login-name (i.e. availability for the user to register using the name) , we will do the following simple steps to achieve this:

1. Create the Java Script method that call our action class:
//this is the request object
var request= null ;
//this is the function that will be called to submit our request, it is generic function that accept URL and value and param so it can be used by different components:

function isUniqueName(url,value,param){
if(value==null || value==""){
alert("Please Enter Valid "+param+"!");
return false;
}
createXmlHttpRequest();
request.onreadystatechange = handleRequest;
request.open("POST",url+value,true);
request.send("<?XML version=\"1.0\" encoding=\"UTF-8\"?>");
}
//This function to create our request object for different browsers
function createXmlHttpRequest(){
if(window.ActiveXObject){
request = new ActiveXObject("Microsoft.XMLHTTP");
}
else if(window.XMLHttpRequest){
request = new XMLHttpRequest();
}
}
//this is the function that handle the response and update the UI, it assume there will be div named "Output" to recieve the outcome of the http request made:
function handleRequest(){
if(request.readyState == 4 && request.status == 200){
value=request.responseText;
if(value == null){
value = request.responseXML;
}
document.getElementById("output").innerHTML = value;
}
}

2.Import Java script file in the html page:

<script language="JavaScript" src="/..../ajax_check_name.js">

-This is the name of our java script file.

3.Add html components that will use these functions:

//login field:

Login Name <html:text property="loginName" maxlength="16" style="width:250pt" onblur="isUniqueName('/..../register.do?stepId=14&name=',this.value,'loginName');"/>

//check button
<img src="/..../images/question.jpg" alt="Check Availability?" onclick="isUniqueName('/.../register.do?stepId=14&name=',document.forms[0].loginName.value,'loginName');" style="cursor:pointer">

//output div
<div id="output"></div>


- As you can see we call the Ajax function 2 times one on leave the text field and another one when click on check ourselves.

4.In Action Class:

String stepId=request.getParameter(IActions.STEP_ID);

if(stepId.equals("14")){
String name = request.getParameter("name");
PrintWriter out = response.getWriter();
if(accountBD.loginNameAvailable(name)){
out.write("< src='/.../images/not_available.jpg' />");return null;
}else{
out.write("< src='/..../images/available.jpg' />");return null;
}
}

- Of course the logic here , if login name already exist , show not available image to the user, otherwise it is available to use it.

- You should notice the null return here , is to by-pass struts forwards return from the mapping files, this behave as if you are using Servlet directly.

* The Output will looks like :
Name already exist.
Name available for use.